If you're looking to optimize your lighting control system, sACN (Streaming ACN) is a powerful protocol that can take your setup to the next level. Built on Ethernet, sACN allows you to transmit DMX data over a network, offering greater flexibility, scalability, and reliability compared to traditional DMX systems. In this tutorial, we’ll guide you through the process of implementing your first sACN nodes into your existing luminaires, so you can start reaping the benefits of networked lighting control.
What You’ll Need
Before you begin, gather the following:
- sACN Node: This device converts sACN data (sent over Ethernet) into DMX signals for your fixtures. Popular options include the ETC Response Mk2, Luminex DMX King, or Pathway Connectivity Pathport.
- Ethernet Cables: Standard Cat5e or Cat6 cables will work.
- Network Switch: A basic Ethernet switch to connect your sACN node, lighting console, and other devices.
- Lighting Console or Software: Ensure your console or software supports sACN (most modern consoles do, including ETC Eos, MA Lighting, and Chamsys).
- Computer: For configuring the sACN node and testing the setup.
- Existing DMX Fixtures: Your current luminaires that will now be controlled via sACN.
Step 1: Plan Your Network
Before connecting any hardware, plan your network layout. Consider:
- How many universes do you need? Each DMX cable only supports a single universe.
- Determine the sACN node size(s) you need. There are nodes for 1 to 64 universes available. You can distribute multiple nodes across the venue.
- Ethernet and DMX cable lengths: Where will the sACN node and switch be placed relative to your fixtures?
- Will you use a dedicated network for lighting, or will it be shared with other systems (e.g. audio or video)?
Step 2: Connect the sACN Node
- Power the Node: Connect the sACN node to a power source. Many nodes use a standard IEC cable or PoE (Power over Ethernet).
- Connect to the Network: Use an Ethernet cable to connect the node to your network switch. Your lighting console has to be on the same network.
- Connect DMX Outputs: Use standard DMX cables to connect the node’s DMX outputs to your fixtures. Most nodes have multiple DMX outputs, each corresponding to a universe.
Step 3: Configure the sACN Node
- Assign an IP Address: sACN nodes need a unique IP address to communicate on the network. Most nodes come with a default IP (check the manual), but you’ll likely need to configure it to match your network’s IP scheme.
- Use the node’s configuration software (often provided by the manufacturer) or a web interface to set the IP address.
- Set Universe Mapping: Configure which DMX outputs correspond to which sACN universes. For example: DMX Output 1 might be Universe 1, Output 2 might be Universe 12, and so on.
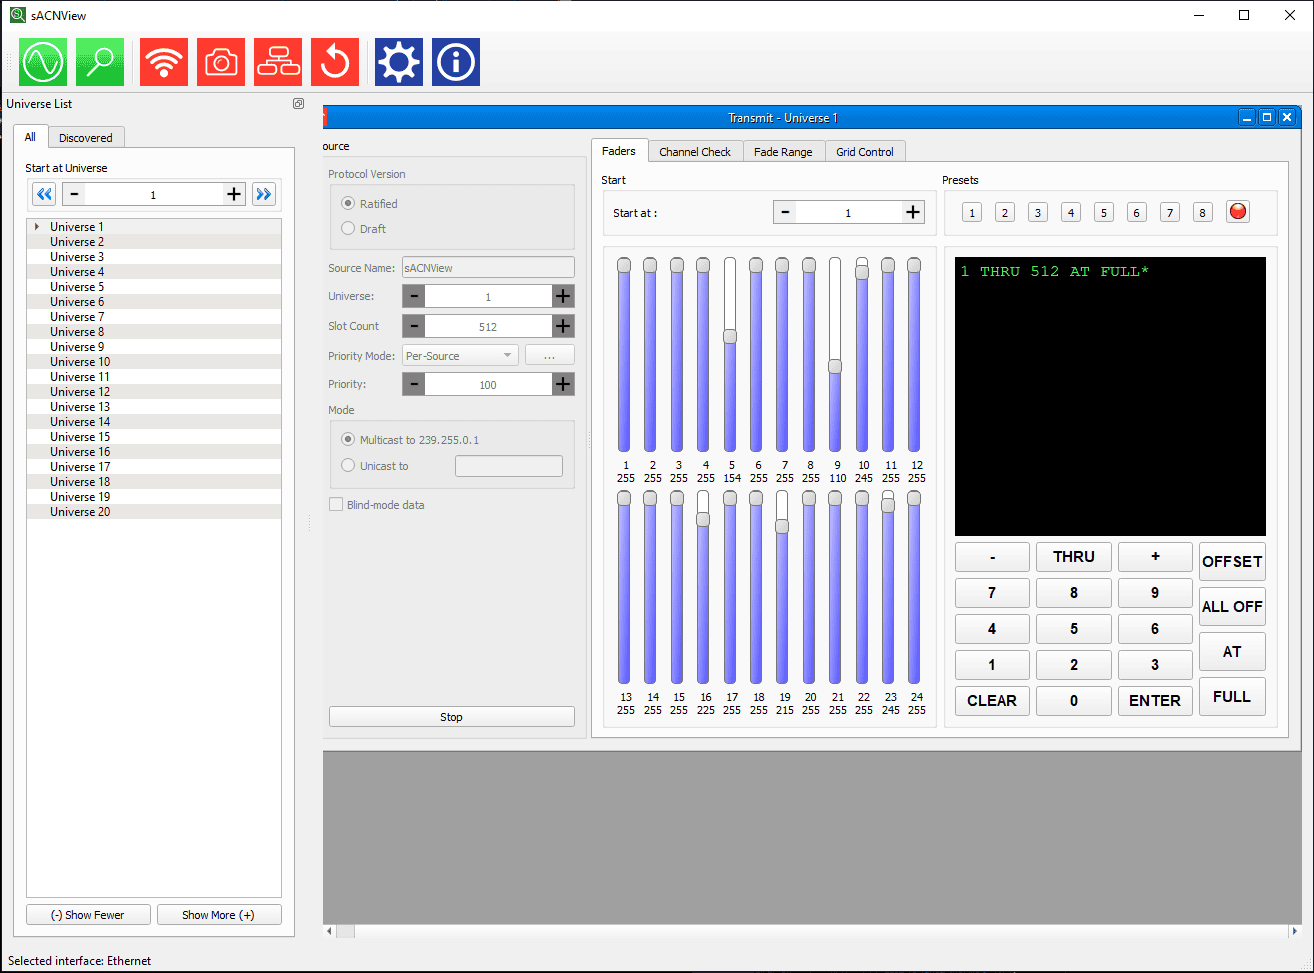
- Test the Connection: Use a network testing tool (like sACNView or the node’s built-in diagnostics) to ensure the node is receiving data.
Step 4: Configure Your Lighting Console or Software
- Enable sACN Output: In your lighting console or software, enable sACN as the output protocol. This is usually found in the network settings.
- Map Universes: Assign the sACN universes you already set in your node to your console’s output universes.
- Test the Setup: Patch a few fixtures in your console and check if they respond to control signals. If not, double-check your IP settings, universe mapping, and DMX connections.
Step 5: Expand and Optimize
Once your first sACN node is up and running, you can expand your setup:
- Add More Nodes: For larger rigs, add additional nodes and configure them with unique IP addresses and universe mappings.
- Use Network Switches: If your network grows, use managed switches to segment traffic and ensure reliable data transmission.
- Implement Redundancy: For critical events, set up redundant network paths to avoid single points of failure.
Troubleshooting Common Issues
- No communication between console and node:
- Check that the IP addresses are correct and on the same subnet.
- Ensure the network switch is functioning properly.
- Verify that sACN is enabled in your console.
- Fixtures not responding:
- Confirm that the DMX cables are properly connected and terminated.
- Check the universe mapping on both the node and console.
- Test the fixtures with a traditional DMX console to rule out hardware issues.
- Network latency or dropouts:
- Use quality Ethernet cables and switches.
- Avoid overloading the network with non-lighting traffic.
- Consider using VLANs to prioritize lighting data.
Why sACN is Worth the Effort
Implementing sACN nodes into your existing setup might seem like a technical challenge, but the benefits far outweigh the initial effort. By transitioning to a DMX-over-Ethernet network lighting system, you gain:
- Scalability: Easily add more fixtures and universes without running out of channels.
- Flexibility: Control your rig from anywhere on the network.
- Simplified Cable Management: Replace bulky DMX cables with sleek Ethernet cables.
- Future-Proofing: sACN is widely supported and integrates easily with modern lighting technologies.
Final Thoughts
Adding sACN nodes to your existing luminaires is a smart investment that will streamline your setup, ease cabling and lets you focus on your creative possibilities. By following this tutorial, you’ll be well on your way to mastering networked lighting control. Once you experience the ease and power of sACN, you’ll wonder how you ever managed without it.
So, grab your sACN node, fire up your console, and start transforming your lighting setup today. The future of event lighting is networked, and you’re about to be at the forefront of it. Happy networking!
Who we are
We are QubiCast, a start-up in the field of lighting. Right now, we are developing QubiSet, a solution for lighting engineers to get their setup working much easier. We are also developing QubiCore, a network stack implementing all these protocols we are talking about. You can meet us at the ProLight & Sound in Frankfurt, Germany in hall 12.1 booth B51 from May 8 to May 11, 2025. If you need tickets, just write us a message or send a mail to contact@qubicast.com.